

How To Use Garden Harvest
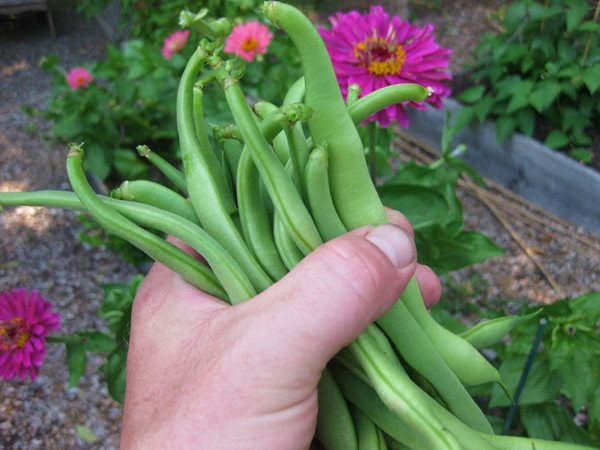
Photo by: Kevin Lee Jacobs
Saving, savoring, and storing
Many gardeners can't keep up with the abundant supply of vegetables that their garden produces. But it's easy to have a stash of healthy, home-grown food in the freezer or cellar that will allow you to savor the taste of summer long after your garden has disappeared beneath three feet of snow.
While I admire the folks who are willing to can their vegetables, there are other, less time-consuming and sweat-inducing ways to store food through the winter. I've put together a list of my favorite waste-not, want-not tricks for preserving beans, greens, herbs, onions, and garlic, all without sweating over a hot stove.
Kevin Lee Jacobs blogs at A Garden for the House. He was introduced to gardening when he was no taller than a delphinium. Today, his home in upstate New York features formal rose gardens outdoors and lavish window gardens indoors.
Green beans
Green beans, picked at the peak of perfection and frozen in bags, are delightful to have in winter. I serve them as a side dish, and sometimes, I add them to soups and stews. Be sure to harvest your beans before they get too old—even when they are picked fresh off the plant, overly mature beans are woody in texture.
Blanching
To eliminate the enzymes that can alter the flavor of green beans and turn them into mush when frozen, it is necessary to blanch them first. When you blanch, you boil the beans briefly and then plunge them into ice water.
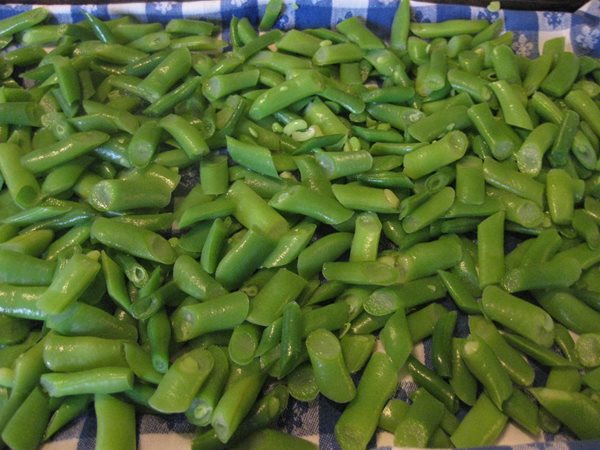
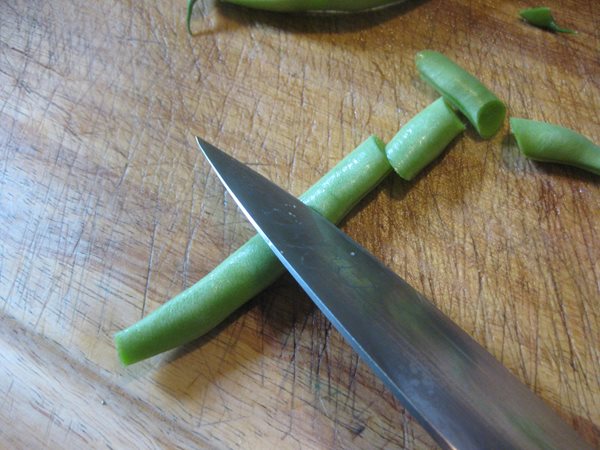
Trimming and slicing:After rinsing the beans in cold water, trim off the ends. Then slice the beans into equal-sized pieces. I cut mine into ½-inch segments. For neatness, I always slice on the bias, as shown.
Blanching: Drop the beans into a big pot of boiling water; cover, and cook for exactly three minutes. Timing begins the moment the beans hit the water. Then transfer the beans to a big bowl of ice water, and chill them for exactly three minutes. Drain well.
Drying and flash-freezing: Lay the beans out in a single layer on a cloth-lined baking sheet. Blot tops of beans with another towel. (Dry beans won't stick together when frozen in a bag.) Then set the baking sheet in your freezer for an hour or so.
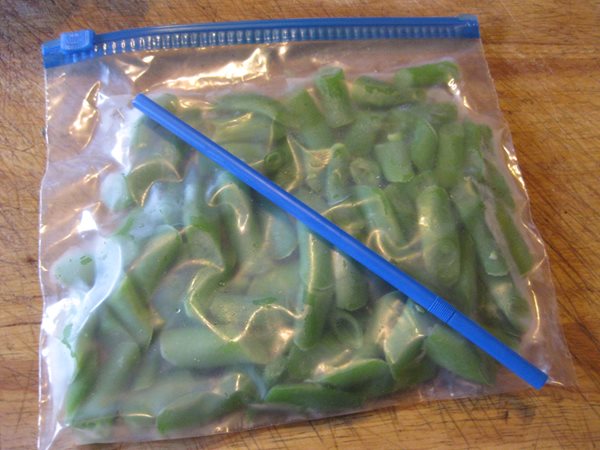
Bagging: Transfer the beans to plastic freezer bags. You might limit, as I do, the amount per bag to a single serving (usually a half-cup) for each family member. Since we are a family of two, I place one cup in each one-quart bag. In any event, do not overfill bags. When the bag lies flat in the freezer, the beans should form a single layer.
Vacuum Sealing:To avoid freezer burn, express all air from the bag, to create a vacuum-seal. I remove the air by partially sealing the bag, inserting a drinking straw, and sucking. True, this is a primitive way to vacuum seal, but it does the job. If you have an electric vacuum-sealing gadget, by all means use it.
Label and Date: Label and date the bag. If properly blanched, frozen, and sealed, green beans will stay fresh for an entire year of good eating.

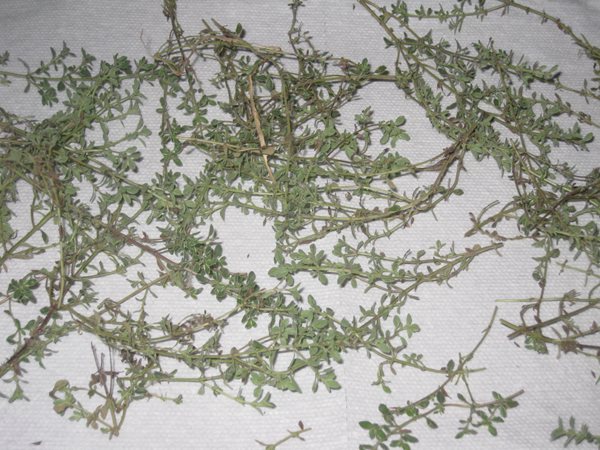
Summer Greens
Just think of all the winter meals your summer greens will allow you to make: I've enjoyed creamed beet- and turnip-tops as a Thanksgiving side dish and an awesome Swiss chard quiche for New Year's brunch. Kale (pictured in this photo) makes a delicious topping for pasta on a snowy evening; add cheese and you've got a balanced meal.
Any leafy green that is commonly cooked can be preserved through freezing. In addition to the leafy greens I've already mentioned, you can freeze collard greens, spinach, dandelion, and mustard greens.
For long-term storage, be sure to blanch the greens before you freeze them. The proper blanching time for all greens except collards is two and a half minutes. Collards, which are not tender, require a three-minute blanch.
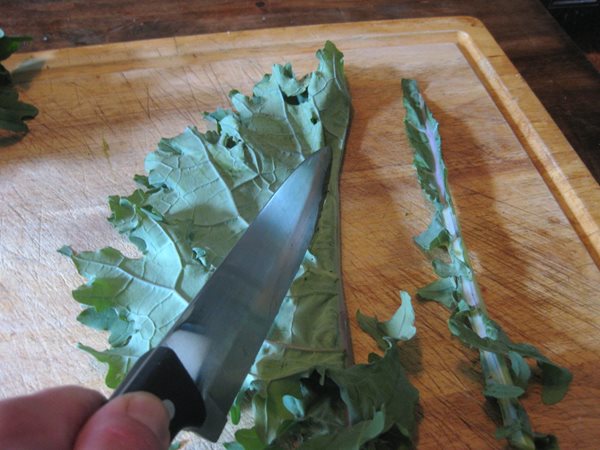
Preparing Summer Greens for the Freezer
Trimming, chopping, and washing the greens: Trim off the tough portion of stems. I remove the fibrous stem from kale by simply folding a leaf in half, as pictured, and cutting along the edge. Then cut or tear the leaves into big pieces, place them in a big bowl of water, and swish them around to remove any dirt. Rinse thoroughly.
Blanching: Dump the leaves into a big pot of boiling water. Cover the pot, and cook for two and a half minutes (three minutes for collards). Begin timing the moment the greens hit the water. Transfer to a big bowl of ice water, and let them chill for two and a half to three minutes. Drain well.
Drying: Lay the leaves out on a baking sheet lined with either a cloth towel or several paper towels. Blot the top with more towels. The goal here is to absorb excess water—leaves don't have to be completely dry before you freeze them, but try to get them as dry as possible.
Bagging and sealing: Arrange clumps of leaves in serving sizes, then loosely pack into plastic freezer bags. As for the green beans, vacuum seal with gadget or straw. Label and date the bag.
Label and date: Label and date your bags—frozen greens will keep for up to one year.

Saving Herbs
If you've ever shopped for fresh herbs at the grocery store, you know how expensive they can be. To save time and money, pick your own herbs while they are growing in your garden and freeze them. It is freezing—not drying—that best preserves the aromatic oil of the leaves. I freeze my own herbs in three different ways: cigars, cubes, and loose leaves.
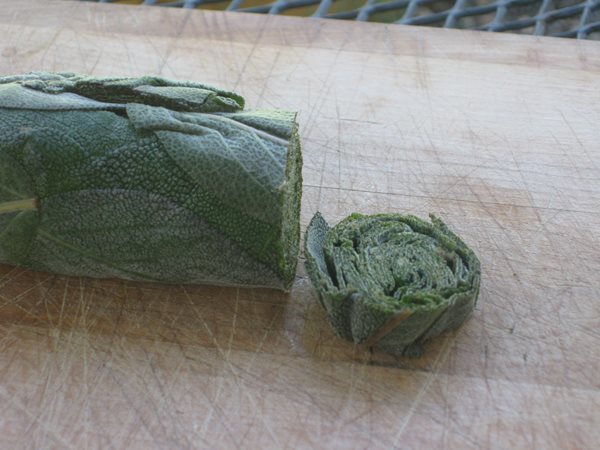
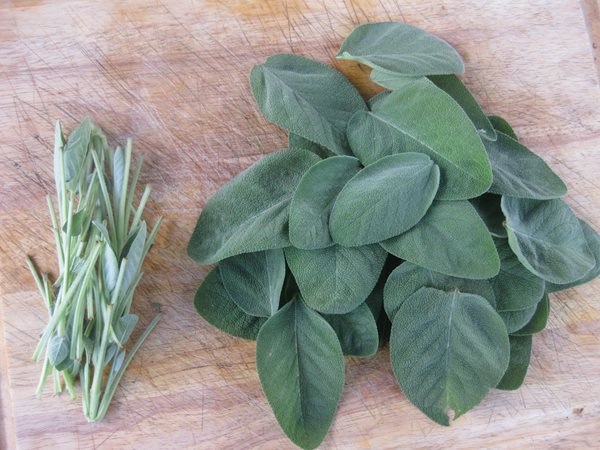
Herbal "cigar":It was my neighbor Margaret Roach who suggested this nifty way to store Italian parsley. I find the same procedure works well with other large, flat-leaved herbs too, like sage and lovage. When needed, simply cut off a portion of the cigar, and return the rest to the freezer-bag.
To start, pinch off stems. Then rinse the leaves in cool water, and dry them. Be sure to dry thoroughly—wet herbs will turn black and mushy in the freezer.
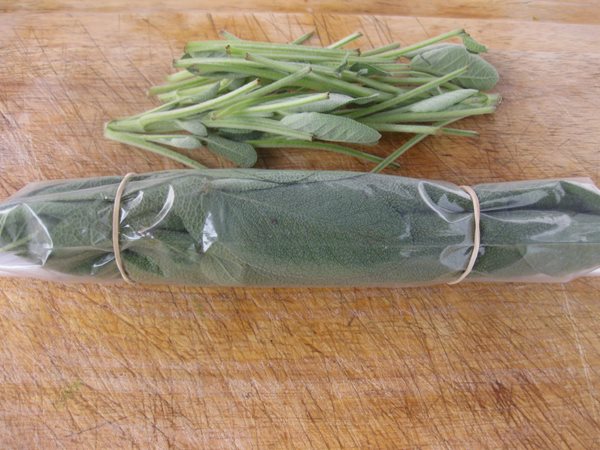
Forming the cigar: Pack the leaves into a quart-size plastic freezer bag—really cram in the leaves. Then roll the bag up tightly, cigar-like, forcing air out as you work. Seal the bag, secure with elastic bands as illustrated, and freeze.

Presto: pesto!
Herbal cubes: Cubes are the ideal way to preserve basil and oregano. These herbs with tender leaves seem to retain their flavor best when suspended in water or oil. I make the cubes by blending two cups of leaves with a half cup of olive oil in the food processor, then spooning the mixture into ice-cube trays. When solidly frozen, transfer cubes to freezer-bags.
I find these cubes are extremely convenient. Sometimes I combine thawed basil cubes with pine nuts, garlic and parmesan cheese, and presto, I have pesto. Sometimes, I arrange six or more oregano cubes on a frozen pizza before baking it. And of course, both basil and oregano cubes can be dropped into simmering stew.
Storing woody herbs
To store rosemary and thyme, which have tough and woody stems, I first remove the leaves, using this neat trick:Cut sprigs from plants, lay them out on a paper towel–lined baking sheet, and freeze. Then give the sprigs a toss, and almost every leaf will shake loose from its stem. Discard stems, shape the towel into a funnel, and pour the leaves into glass jars or plastic tubs and freeze.
Cigars, cubes, and loose leaves will remain fresh and aromatic for at least one year when frozen.
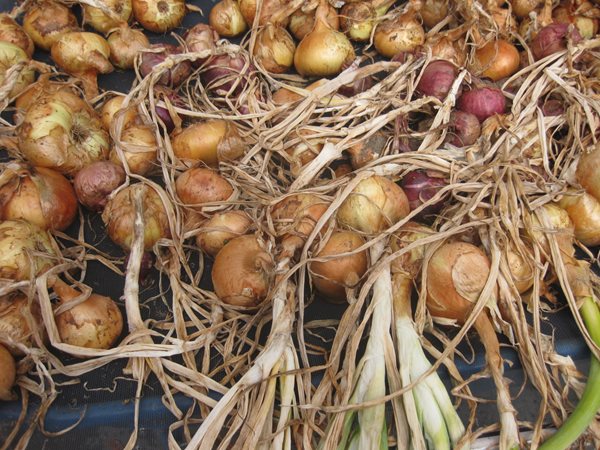
Onions
Onions are ready for harvest when their green tops fall over. After lifting the bulbs, brush or shake off loose soil.
Then lay them out in a single layer in the sun. I spread mine out on window screens, as pictured. These screens, which permit ventilation from below, are balanced between chairs, or on top of clay pots on my patio. Let the bulbs "cure" for two to three weeks, or until their outer skins turn papery, and their green stalks wither and turn brown. Curing is vital to winter storage success.
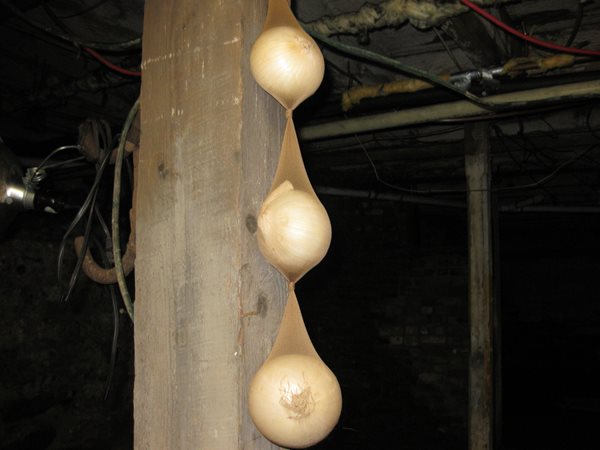
Storing onions
After curing, cut off all but one inch of stem. Then store the bulbs in a dim, dry place which will remain reliably cold, but above freezing (35 to 45 F degrees is ideal).
Some gardeners like to pile their onions in a woven basket for the cool duration, an arrangement that can invite rot. A better plan is to store the bulbs in some manner which keeps them from touching each other. I store mine—yup, it's true—in pantyhose.
Pantyhose storage:
Cut off the legs (or use thigh highs!) of a pair of new pantyhose and then place within a detached leg one onion, and above it, tie a knot. Continue knotting and "onioning" until the stocking is sufficiently filled.
The bulbs, secure in their lingerie quarters, can be suspended from either a hook or a rafter. To facilitate hanging, I insert a length of 22-gauge wire through the top knot. Then, when an onion is required, I simply cut or tear an opening in the stocking, and retrieve a single bulb.
Stored this way, you can count on onions to remain fresh and trouble-free for up to one year.
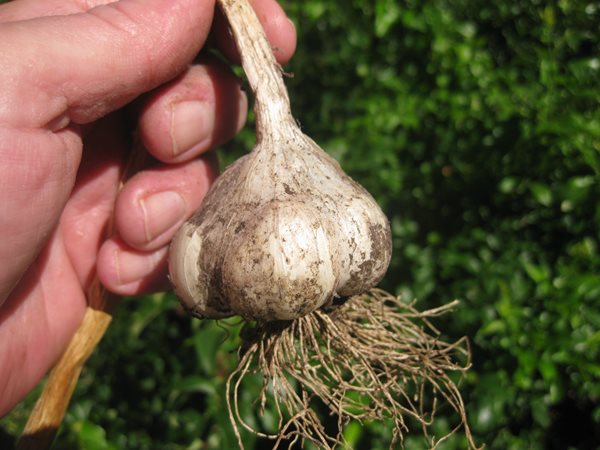
Storing garlic
You can store home-grown garlic in the same manner as onions, with this one very important exception: Since garlic is prone to sunburn, let it cure, for six to eight weeks, in a well-ventilated area that's out of the sun. Then cut off stems and roots before knotting the heads into lengths of pantyhose.
Unfortunately, garlic does not have a long shelf life. Even in a cool, dark, and dry location, it will soften and attempt to sprout after four to five months.
For more information on curing and storing your home-grown potatoes, visit How to Grow Potatoes.
How To Use Garden Harvest
Source: https://www.gardendesign.com/pictures/how-to-preserve-your-harvest_208/
Posted by: greenwoodsommestake.blogspot.com
0 Response to "How To Use Garden Harvest"
Post a Comment