

What To Use As First As A Filler For Tall Raised Garden Bed
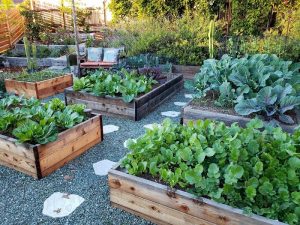
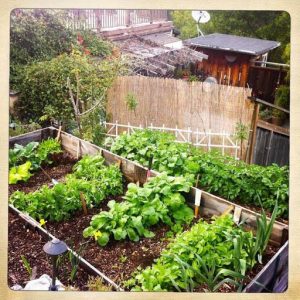
For new gardeners, filling a tall raised garden bed on budget is a daunting task. However, many appreciate the convenience that raised garden beds offer. For instance, one can easily control their soil type, weeds that appear and also keep the garden beds warmed up faster during the spring. Also, greeneries thrive better in raised beds than in-ground beds. This is probably because the soil doesn't get compacted like in the latter. However, there exists one disadvantage, you have to occasionally fill the tall raised garden bed.
Well, there are many varied ways of filling a raised garden bed with soil that works great. In this read you'll find well-researched great deals on how to fill a tall raised garden bed, but first let's get this right.
For those who perceive 'dirt' to be soil, kindly change your perception. While soil is biologically active and rich in nutrients needed for plants growth, dirt is devoid of all this. Soil gets better with time as its food web blossom. As such, our goal here will not only be to fill raised garden beds with soil, but also create a conducive living organic condition that your plants will cherish.Before filling your raised garden bed with the right stuff, it's good to ask this question.

What's Your Raised Garden Bed meant for?
Before you start your fill-up, determine your bed's usage. This is because plants have different root systems-some are shallow-rooted while others are long-rooted. For instance, drought-tolerant plants have deep root systems and vice versa. With an idea of each container's root depth, you can easily customize your fill materials.
Determine the Amount of Soil Needed
This is the most important step towards filing your raised garden bed. Whether you are buying bags of soil or digging it from the yard, you ought to calculate how much organic material and soil you'll need. This helps come up with an estimate of the amount needed and the cost you may incur. To determine the amount of material the garden bed can hold, calculate its volume. Here is a simple formula.
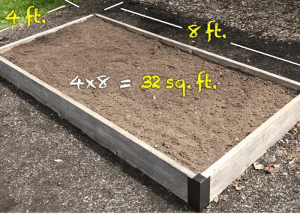
Volume (cubic ft) = Length (ft) x Height (ft) x Width (ft).
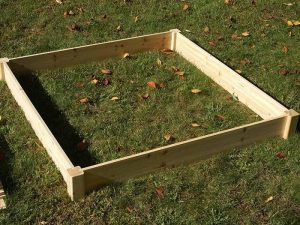
Let's take an example of a pretty standard size raised garden bed. The measurements are eight feet length (L) by four feet width (W) by one feet height (H). The volume will therefore be:
32 cubic feet = 8 L x 4 W x 1 H
As such, if you sight a two cubic feet of garden soils in the store, it means you require sixteen such bags of material to fill the above garden size. If you intend to fill multiple raised beds, it's cheaper to get the materials in cubic yards and buy in bulk.
Soil Source
Being on a budget, purchasing the bags of filler materials may be tricky. As such, mixing garden top soil dug from the garden with an equal amount of compost is ideal. If you still decide to buy some, be careful not to be swindled into purchasing cheap 'fill dirt' made from subsoil. That won't do any good to your plants.
How to Fill a Tall Raised Garden Bed on Budget
Here are four methods that you can use to fill a tall raised garden bed on budget.
1. Core Gardening
This method is quite simple. It aims at creating an internal sponge at the middle of the garden bed. The 'sponge' holds the water and wicks moisture equally in both directions.
Benefits of this method
- Lesser weeds. With the surface of the soil being dry, there's no conducive environment for weeds.
- Minimized disease problems. There's no excess moisture on the surface thus lesser chances of fungus, blight, mildew and mold that cause diseases.
- Deeper root system for the plants . The surface of the soil is mostly dry. The plant's roots therefore have to run deep into the soil in search of nutrients.
- Less watering . This is due to the core's ability to hold water for long. With mulching, watering needs even go lower.
Filling Procedure
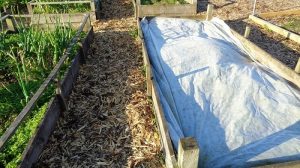
Fill the core of the raised garden bed with wet organic matter that's in the process of decomposing, such as old straw bales. These are so much abundant for free especially after Halloween. Just store them somewhere over the winter to allow them start decomposing before using them to fill the core. Alternatively, you can use leaves, old twigs, grass clipping or even mix them together if they're all available.
- Fill it with the organic matter.
- Walk over it to compact it . Aim at achieving 4-5 inches thickness of the packed down material.
- Charge the core by watering it thoroughly. This helps create a sponge-like center that provides water to the plants throughout the season.
- Fill the remaining part of the raised bed with soil. If there is some that you had removed during creation of the core, fill it back. It's advisable to form a mound down in the middle, it will settle over time. For a new tall raised garden bed, decide on the soil type and the amount required. Don't be too fancy, a 50/50 mixture of topsoil and compost is fine for raised garden beds. We recommend DIY compost to reduce the costs, however this may take time.
- Add extra nutrients and plants. If it's a new raised garden bed, you need to supply it additional nutrients. An organic granular fertilizer and other nitrogen sources such as fish fertilizers will come in handy.
- Mulch and add compost on the soil's surface. Do this at least annually. Doing this will eliminate the need to buy organic fertilizers in future.

Maintenance
After a year, the organic matter will probably have turned into great compost for the garden. The core will most like have gone and worms will naturally be tilling the garden. Some gardeners prefer to recreate the core instead of tilling the garden. However, we feel that is not necessary unless the gardener has no time for watering or the garden is in a very dry climate. Also, that's extra work and uncalled disturbance of soil every year.
In place of the extra work and creating the core annually, we would advise you to mulch throughout and add compost to the top soil annually. This does not only ensure zero disturbances to soil life but also ensures continuous build-up of healthy soil.
2. Hugelkultur Raised Bed
This method is almost identical to the core gardening method above. It involves burying large amounts of rotting debris such as rotting logs and sticks under the soil. As they decompose, they produce heat thus resulting into a warm microclimate in the soil, which can be very helpful in colder climates. The only difference is that the organic substances used are larger and therefore takes longer to decompose. It might take even five years before the base sponge turns into usable soil. The result is a large sponge that holds water and gives the plants the required nutrients.
Filing procedure
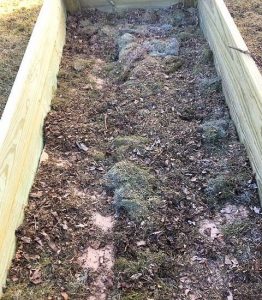
- Place old rotting woods and other debris about 10-12 inches in the raised bed . We advise gardeners on using rotting wood, their water retention ability is higher and they provide more nutrients to your plants compared to the fresh wood.
- Fill all the extra gaps between the large logs with grass clippings, wood chips, bush trimmings, large log with leaves et cetera. This helps save the costs of filing up the raised garden bed.
- Water these organic materials thoroughly . This is because they'll be the source of water henceforth throughout the season.
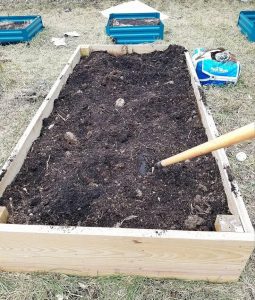
- Fill the empty space with soil . Being on a budget, it's advisable to use the one that had been dug up at the start of the process instead of buying much more. To get your bed full, mix the topsoil with a few bags of compost and add them.

If the necessary resources, i.e. rotting logs are available, this is one of the cheapest method to start a new raised garden bed or enhance an existing one. The buried organic materials are guaranteed to feed your plants for the next five year. You may need to jump-start the nutrients in your soil by using some manure or organic fertilizers. However, this may not be necessary if you had mixed compost with the top soil and mulched it throughout the year.
- Read more: 13 DIY Garden Shed Plans to Build One Yourself
3. Ruth Stout Garden Bed
This method was christened 'Ruth Stout' thanks to the lady who invented it. It encompasses healthy soil that results from mulching the garden with spoiled hay. The spoiled hay breaks down very fast thus feeding the soil and reducing watering needs.
Ideally, the hay should be at least eight inches. Despite the hay being a rich source of weeds, most weeds can't withstand such thick layer of mulch. If you have access to free hay, this method is overly cheap and easy to implement. This method is perfect for planting potatoes.

Filing procedure
- Add a few inches of manure or compost on top of the ground. You can do this without removing any grass or weeds.
- If you intend to grow potatoes, just put the entire seed potato halfway into the layer of the manure.
- Spread the spoiled hay on top of the potatoes. Let the hay be evenly spread to a height of 8-12 inches deep.

- You may or not water this bed and that's all it takes for an awesome potato harvest to occur.

4. Eden Raised Garden Bed
A new bed is first created by covering the ground with cardboard and then wetting it down to smother out any weeds and grass.
Filing Procedure
- Do a subset of one of the first two methods here-above. Start by putting a few organic matters over the cardboard. This can help save some pounds considering you're on budget.
- Mix 50/50 ration of topsoil and compost and fill the raised bed to about 6 inches of halfway.
- Mulch it by adding wood chips on top of this soil. This can be as deep as desired, but four inches are usually enough.

- Add organic fertilizer for the first few seasons. Over time, the wood chips rots and create healthy soil for plants.
Adding worms

For each of the above methods, we advice you add a few worms where possible. Worms play a very critical role in soil food web and helps enhance organic soil. They continually aerate and improve soil structure thus improving moisture retention, drainage and oxygen flow to plant's root systems. As they continue to populate, they break down organic matter therein faster thus more nutrients for your plants.
There you go. Depending on which free resources are at your disposal, any of the above four methods on how to fill a tall raised garden bed on budget will work greatly for you. Each of the above methods is basically the same thing, that's filling the bed with natural organic matter and mulching. Fortunately, they all set your garden up for success. Nature works in exactly the same way, the above procedures will just speed up your gardening needs. The secret lies in life-givers which are basically top soil, compost and worms. The rest are extra boost.
What To Use As First As A Filler For Tall Raised Garden Bed
Source: https://www.igra-world.com/fill-a-tall-raised-garden-bed-on-budget/
Posted by: greenwoodsommestake.blogspot.com
0 Response to "What To Use As First As A Filler For Tall Raised Garden Bed"
Post a Comment